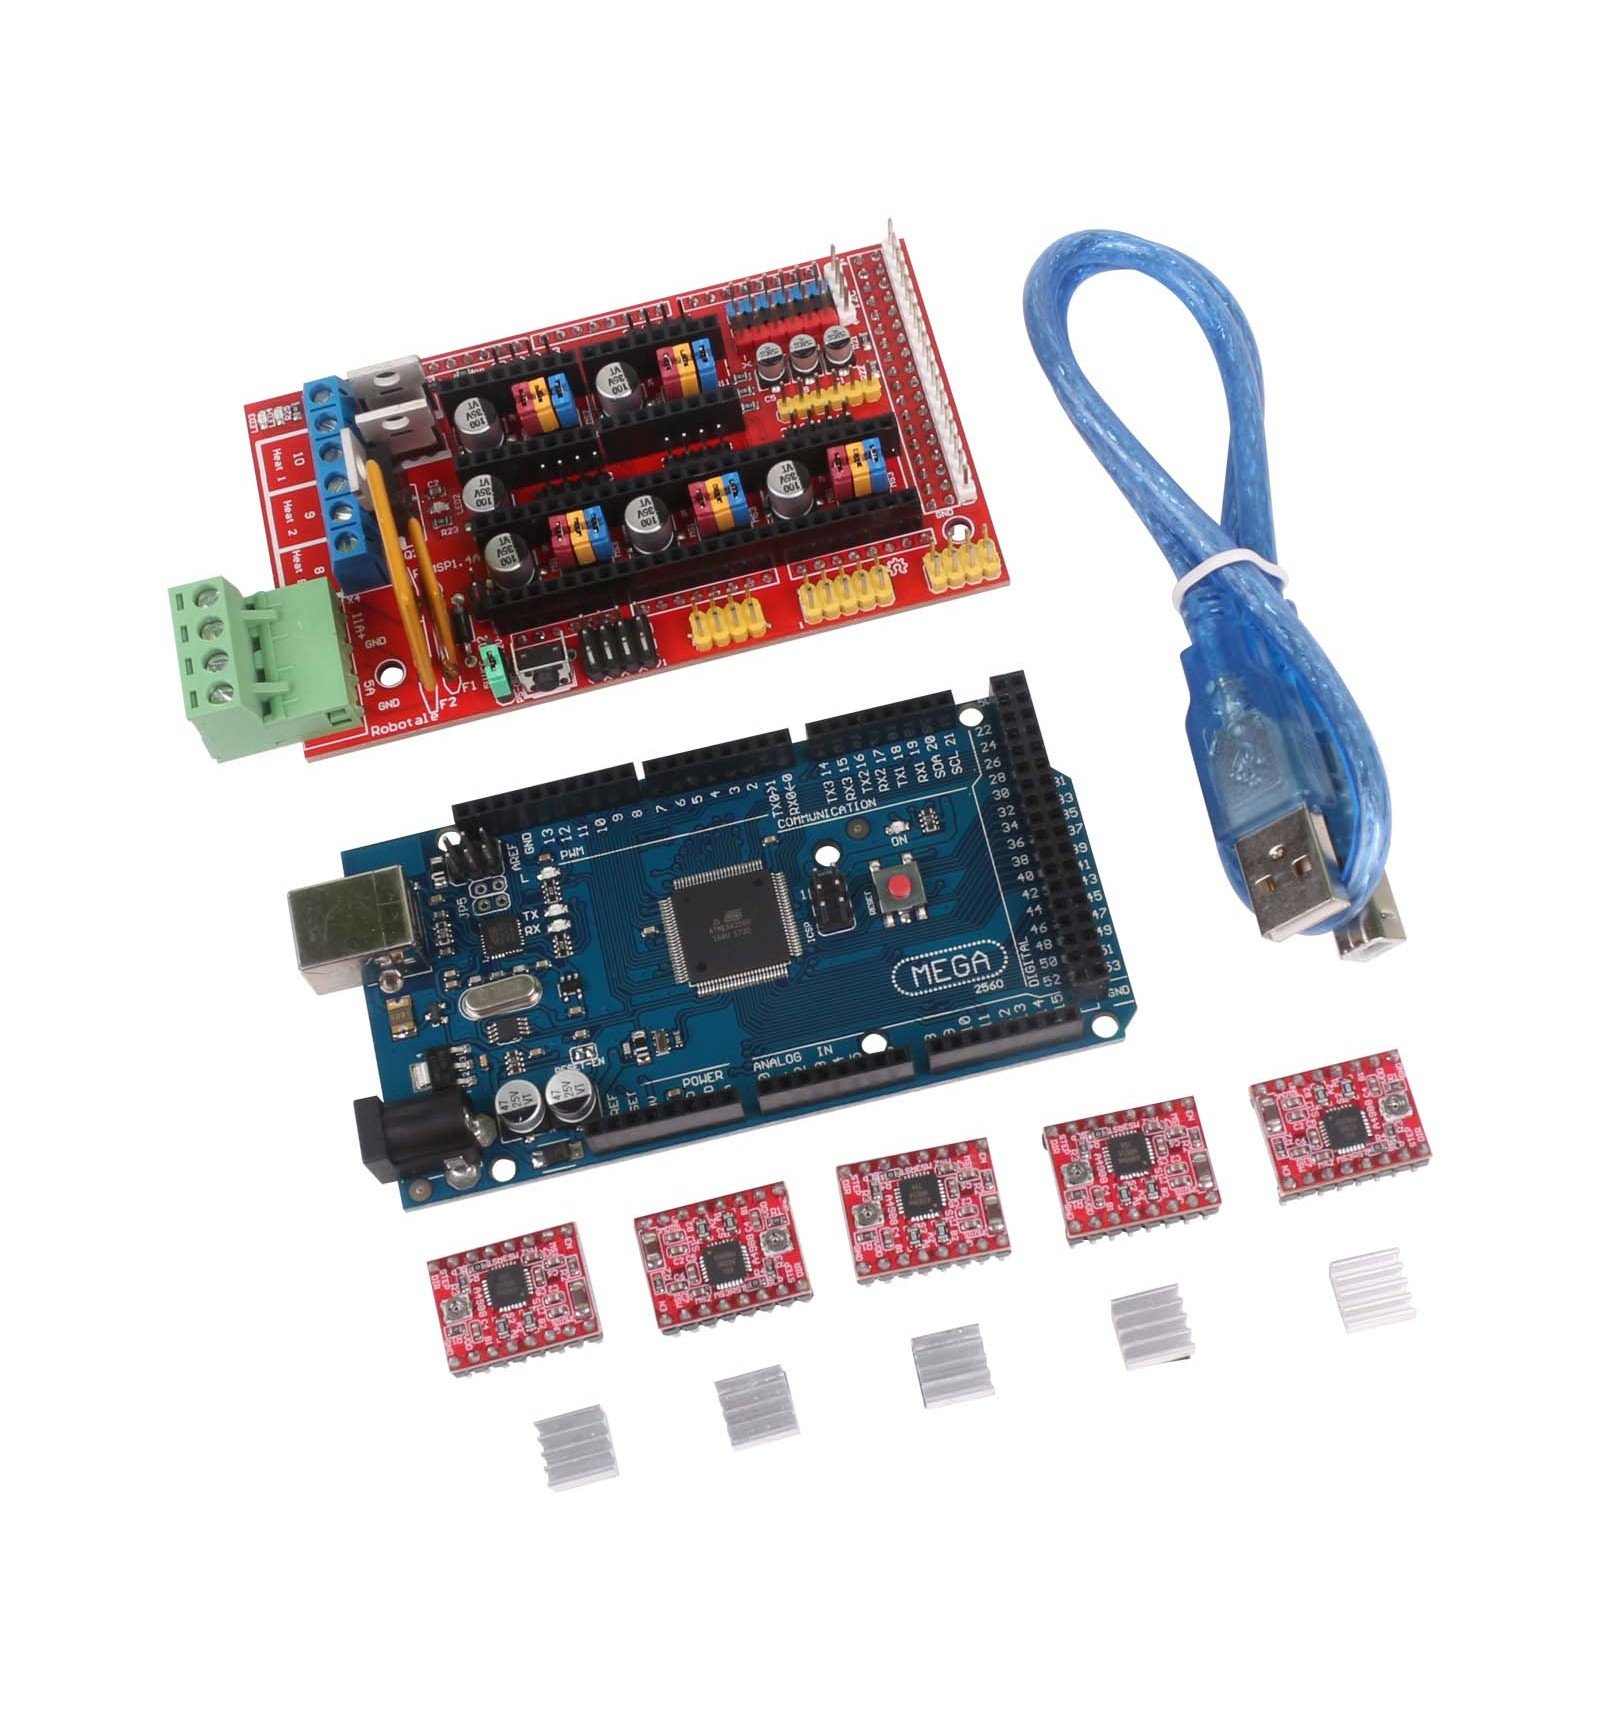
RAMPS 1.4 Kit with Arduino Mega & 5x A4988 Drivers
navigation search This page documents the addition of Wifi capacities to the RAMPS Arduino Mega Shield. (I am currently working on RAMPS 1.4) Using the Arduino Mega 2560's UART port 2 (pins 16 and 17) the Wifi module acts like a USB cable to send GCODE to the printer. Components

RAMPS 1.4 · iDr.
Friday. Fri. 5PM-4AM. Saturday. Sat. 5PM-3AM. Updated on: Aug 05, 2023. Mystic pub, #12 among Lodi Vecchio pubs & bars: 40 reviews by visitors and 1 detailed photo. Find on the map and call to book a table.

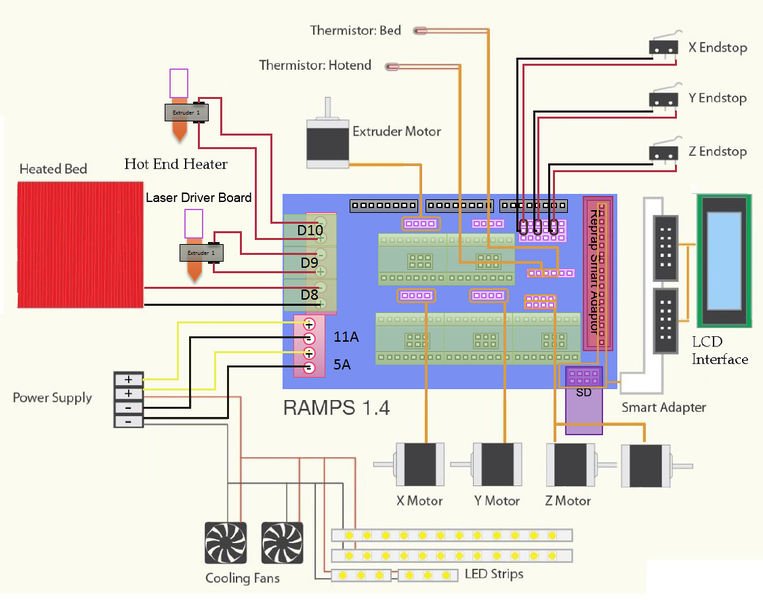
Ramps 1.4 Wiring Diagram
A major part of this project is the RAMPS board - a single control board / shield to which all of the other parts of the printer can be easily hooked up. A USB connection to a computer is the.
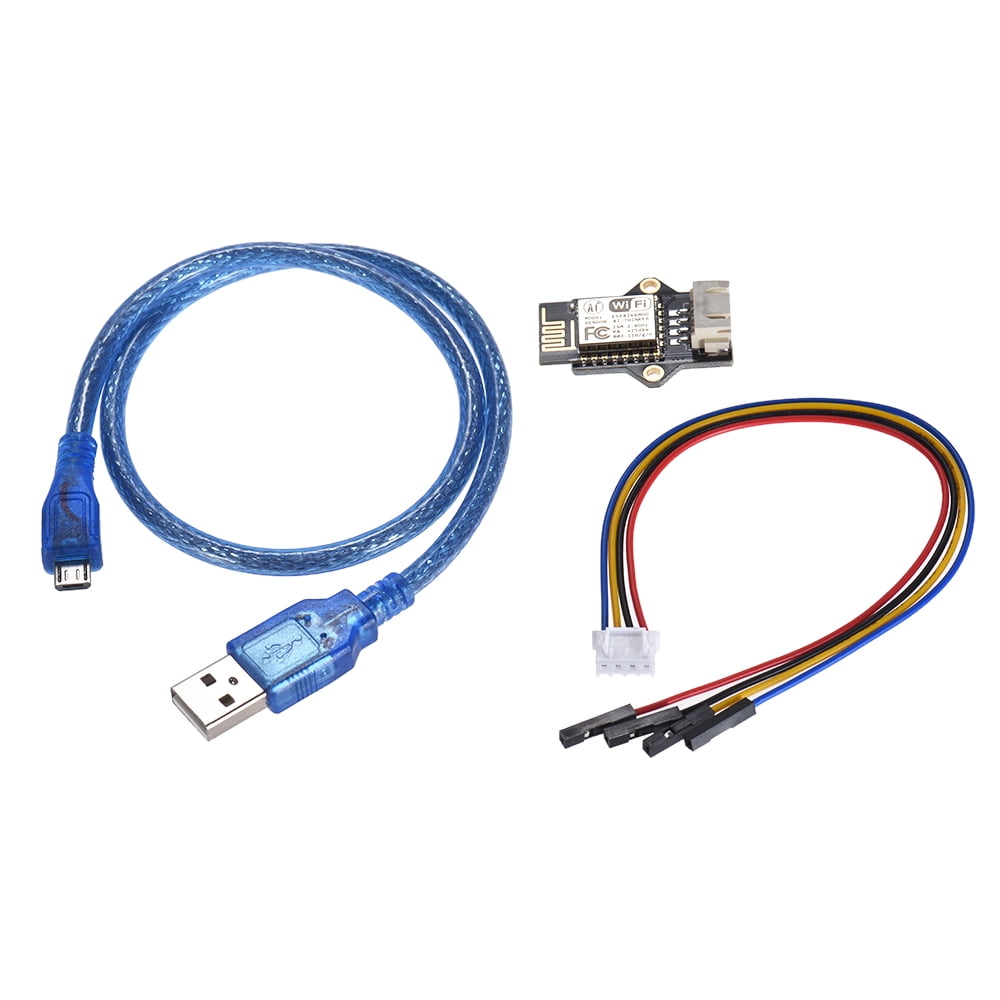
ESP8266 3D Printer WiFi Module Wireless Transceiver USB Serial Port Print Compatible Ramps 1.4
Can we add WIFI to 3D PRINTER (RAMPS 1.4 and other, DOIT DT-06)?I will review a Doit DT-06 serial to WIFI module. I will show you, if you can use it to make.

ramps 1.4 kit
The Ramps 1.4 is a popular Arduino Mega-based controller board that allows you to control multiple stepper motors and other peripherals. Understanding the pinout diagram of the Ramps 1.4 board is essential for wiring and configuring your machine properly.

RAMPS 1.4 Kit with Arduino Mega & 5x A4988 Drivers
The RAMPS WiFi Adapter provides wireless networking for the RAMPS controller using Roving Network's RN-171 WiFi Module. Compatibility Version 0.2 has been tested with RAMPS 1.4, Marlin, and Printrun . Installation Notes

RAMPS 1.4 Basic Kit 3D printing experts ReprapWorld USA
I have a 12V laser module with a 3 pin hookup (12V +/- and 5V PWM) and am running a RAMPS 1.4 board using the 515 dual endstop firmware. From what I understand I should plug the red lead right into the 12V input on the RAMPS board, the yellow PWM lead into pin 44 of AUX-2 on the RAMPS board, and the black lead to ground.

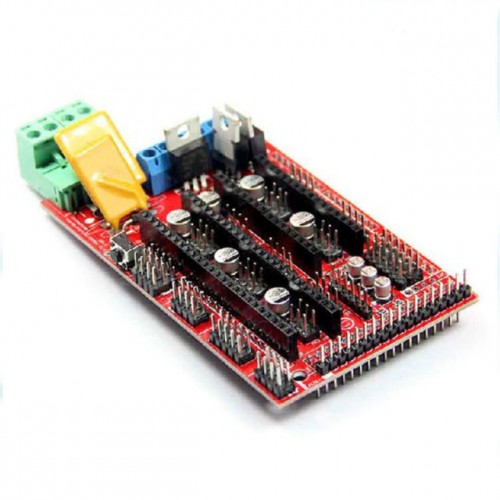
RAMPS 1.4 shield Modern Electronics
Lodi Vecchio : Lodi Vecchio Localisation : Country Italy, Region Lombardy, Province Lodi. Available Information : Postal address, Phone number, Fax number, Email address, Website, Mayor, Geographical coordinates, Population, Altitude, Area, Weather and Hotel. Nearby cities and villages : Tavazzano con Villavesco, Salerano sul Lambro and Borgo San Giovanni. - City, Town and Village of the world
Ramps 1.4 A shield que une Impressão 3D e Arduino Blog Eletrogate
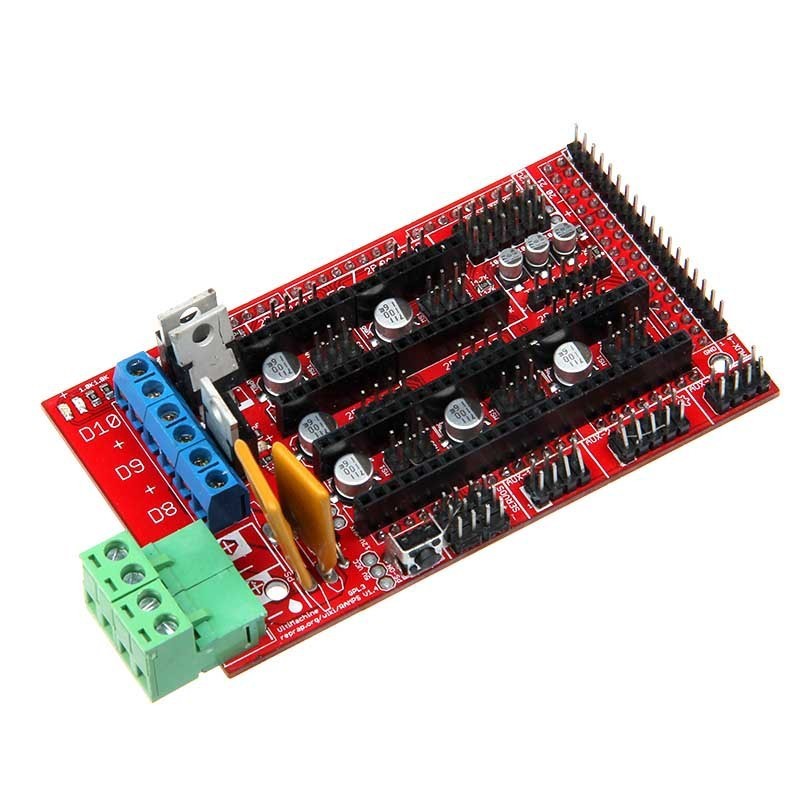
RAMPS 1.4 is probably the most widely used electronics for RepRap machines as of March 2014. It consists of a RAMPS 1.4 shield, an Arduino Mega 2560 board (or a clone), and a max of five Pololu Stepper drivers.
RAMPS 1.4 Fully Assembled at MG Super Labs India
Step 1) Install Arduino and driver (Please download the Arduino IDE version 1.5.X, you'd better download 1.5.4 version IDE). First, please download Arduino IDE from https://www.arduino.cc/en/Main/OldSoftwareReleases#previous. Step 2) use USB cable to connect Arduino Mega2560 and your PC.

modify ramps 1.4 to make it more reliable
We install Wifi on our BTT SKR 1.4 board and a BTT TFT touch screen. We configure ESP3D software to make it all work on an ESP8266.00:00 Intro00:38 SKR 1.4 b.

RAMPS 1.4 RepRap
The RAMPS 1.4.4 shield is a RAMPS-1.4-pin-compatible shield that can be used with: 8-bit or 32-bit controllers a single 12V or 24V power supply.

RAMPS 1.4 Arduino Shield купить магазине duino.ru
I use ESP3D Library from luc-githubhttps://github.com/luc-githubESP3D github pagehttps://github.com/luc-github/ESP3DESP library for arduinohttp://arduino.esp.
Ramps 1.4
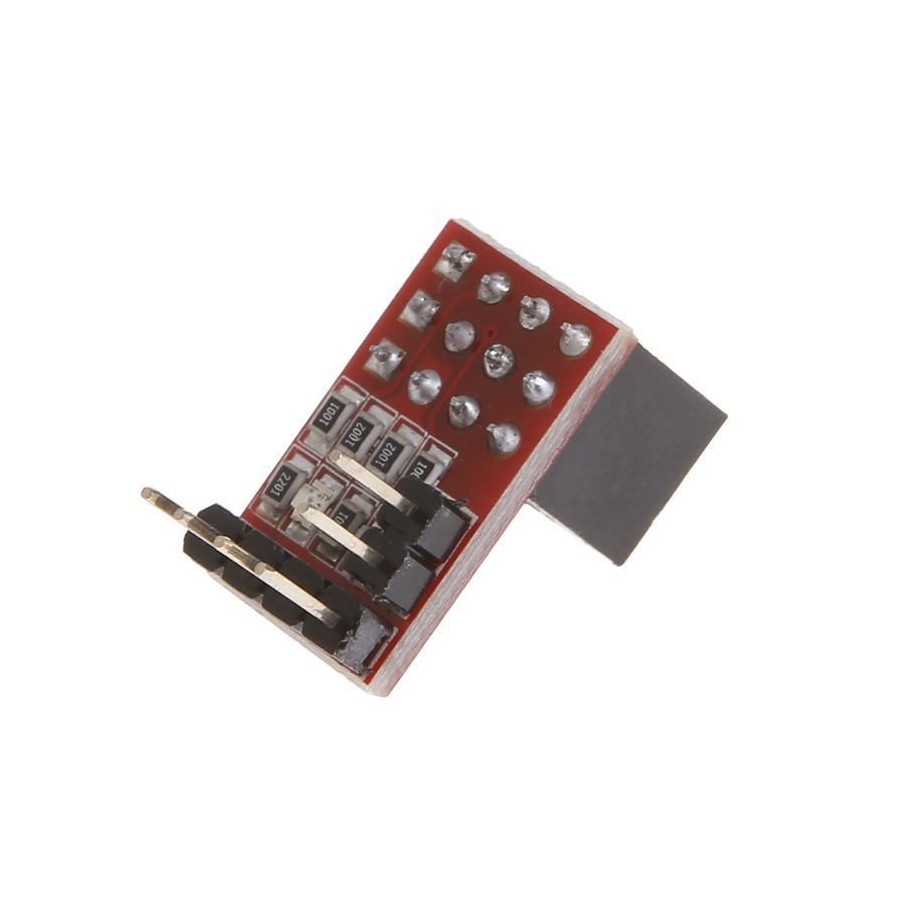
The mega has 4 UARTS, all but one, UART2 (pin 16 and 17) are used for other things. So I can connect to the ramps pins aux 17 and 18. Ramps AUX 17 = Mega 17 (RX2), and Ramps AUX 18 = Mega 16 (TX2). So that part is pretty easy. I also need a logic level converter and 3.3 volts to run the RN. The 3.3 V pin isn't connected on the RAMPS 1.4.
RRD Ramps 1.4 Module
You can choose from Direct Extrusion (motor on the Extruder) or a Bowden type of extrusion (motor feeds filamant through a tube to Hot-end) but it won't make a difference in hooking them up. For this setup I purchased a RAMP 1.4 Kit which has all components needed to setup the controller board RAMPS 1.4 kit $38.99 http://amzn.to/2E3gvYc

Купить Ramps 1.4 RAMPS 1.4 для Arduino Mega 256016 U2 в Украине
RAMPS 1.4 Vitamin Contents 1 Design 1.1 Source 1.2 Variations 2 Wiring 2.1 Bed 2.2 Hotend 2.3 Endstops 2.3.1 See also 2.4 Drivers 2.4.1 See also 2.5 Motors 2.6 Aux Fan 2.7 Power Supply 2.7.1 See also 2.7.1.1 Power for the Arduino Mega board 2.7.2 Power Supply, Details and Considerations 2.7.2.1 Maximum Input Voltage 2.8 Other Install Considerations
